Tampilkan postingan dengan label a. Tampilkan semua postingan

Setting up a website again

| 0 komentar |


Like Hogfish maximus in this photo taken by Chris after he put our boat on the beach at Manjack Cay, Abaco to work on her, I am still not off the ground and into smooth sailing. But for me there is no beach, instead an old laptop. The ocean water Hogfish is waiting for consists of internet Blogs and Websites for me.

I am Chris wife Rachel, let me explain.
Both Chris and I are from another era of exploration. Surfing the web is less exciting than surfing a wave and navigating the web is definately not either of our expertise. But we do get out from time to time on the electronic ocean and enjoy reading other peoples blogs and seeing photos on websites from all over the world. We are information junkies and the internet is a huge fix! And so, we too would like to enter into the current trend (yes I did type that and will carry on, pun intended) Oceans and seas, oh my.

BUT, as I typed at the start, In the beginning there is a lot to learn... And time to spend... and a perfectly good ocean to swim in just next to me. And children to keep track of, yes Kalessin you are still me child; THAT will never change, and Lilly, you are just behind me, looking over my shoulder but I still need to nudge you on to another activity other than bugging your Mom when she is trying to type (is the computer keyboard the new telephone?)

All this and technology that has a language that consists totally of non words like HTMLs and SSPs and WTFs?

What I have learned so far is that most of my photos appear to be of things of a size that I never in my life as an adult have observed, there is a delete button that means it, my computer is outdated and everyone except me thinks I should use it as a dinghy anchor, and I am an optimist because I think there is a high tide for me here on the Web (to float in and even swim strong keyboard strokes) and therefore soon there will be a Blog worth reading about Chris art, Chris boat plans, and of our sailboat Hogfish maximus and our adventures aboard her. We also want to show you our slice of Bahamian shoreside, and invite you to enjoy it as we do love it. As always we have plans A through Epsilon and want to create an interest through the internet.

Be prepared for biased opinions, very strong opinions and even grander provocations. This is going to be another Shallow Minded adventure but this time into the Deep Sea of the internet.

Thank you for your patience. especially you Cristobal.

Dive, dive, dive!!!!


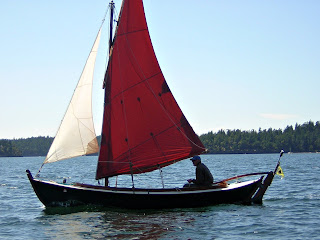
Hogfish maximus during The Round Island Race in Bequia Easter Regatta.


Read More..

Tales from a Terrapin

| 0 komentar |

While I was in Port Townsend for the Boat Fest, I met up with Bruce, who I first met here on-line. Bruce is an adventurer from Portland, Oregon. Now, its a true reality check to meet someone in person, who you think you know so well, here in the Internets. Apparently Ive advised Bruce on everything from purchasing the right trailer to finding a good deal on oars. Hes had some good advise.

I must admit, when Bruce told me he was going to row from Seattle to Port Townsend, I was intrigued but when I heard he was to do it in an Adirondack Guide Boat, hed gotten my attention.


The Adirondack Guide Boat was designed for flushing out game in the reeds of backwoods lakes, not cruising an open sea. But Bruce was determined and he did it. Bruce is a philosopher as much a sailor... possibly there is very little distinction there.

You can share his experience on Terrapin Tales.


He keeps a log in a notebook and sketches some of the entries. How he can do that and navigate a (very) small boat in variable weather is completely beyond me.


This first sketch is a map of his Salish Sea adventures to date. The distances in miles are modest, yet the voyage ethereal.


We found camaraderie on the day-long ride home. Bruce sketched us on the road in the "DoryMan Big Truck", which, with a couple beautiful boats on top, got some attention. For the back-story, please visit Bruce at Terrapin Tales.


Bruce is the new owner of an Iain Oughtred Arctic Tern, of which, we will hear more anon....

Read More..

The Story of a Jib and a Balanced Lug

| 0 komentar |
With Musings on a Lateen.

There was once a lonely Lug who didnt know what he was missing until he met Jib. He sailed to windward, off the beam and dead down, all with apparent equanimity.


Then one day Jib came along and spiced up his life. Now he had someone to get hung up on. Jib liked to languish on his yard and get tangled in his boom. Just the life for a Lug.
Jib had many fine qualities, but fast tacking was not one of them. More like a perpetual holiday for Jib.


Doryman has gotten used to having both of them around. Jib and Lug work well together. The occasional tangle of sheets, boom, leach and yard bother no one.


"Faerings arent suppose to have Jibs". "A balanced Lug and a Jib wont work on the same Boat.".


Let people talk. They are just jealous.

Thanks to Jamie Orr for the photos.

The inspiration for this sail combination came to me from David Oliver of the excellent blog, Lutes which celebrates the traditional fishing vessels of the Balearic Islands. The Balearic sailing rigs developed as a way to facilitate work on deck, while offering performance for navigation. David reminds us it is important to view these rigs as a tool for fishing to understand how they are used. There are types of working craft from around the world with provision for the same or similar sail combinations.


The lutes employ a lateen rig, yet by adding a jib far forward, windward performance is improved.


The addition of a mizzen on a retractable boomkin gives more sail options, not the least of which is the ability to strike that huge main, allowing more room to work. 


While the lateen can be mounted far enough forward to act as a jib and main combination, the option of a jib plus main is more versatile.


The balanced lug rig is very similar to the lateen in function. The ancient lateen is possibly the most beautiful sail in the world.


Davids blog is written in Catalan, but for those of us who have trouble with that complicated language, he offers a translator and we thank him for that! He owns a beautiful lute and its a treat to see one under sail. I recommend a long visit to Lutes.


Read More..

A Mad Idea Fueled by Gin

| 0 komentar |

It started with Camp Tipsy. Alex and I started talking about what we could build, what kind of floating contraption would excite us.  We were unequivocally unanimous in wanting something like a tiny cabin that floats.  Something that we could escape to.


Or maybe it started earlier.  Maybe it started with the river floats.  For years, Id built homemade rafts and floated down major American rivers with friends.
On that first trip, when I was trying to rustle up friends to join the adventure, heres what I wrote "This is not white water rafting. Were talking rivers with class zero rapids. A floating river. A lazy hot summer day eating found apples sort of river. These adventures remain low on specifics, high on general concept, mood, and emotion. Part of an experiment and a belief in the power of boredom to inspire."

In 2005, a few of us set out on a punk rafting adventure, building a raft out of found and scavenged materials and floating for a week, Huck Finn-style, on one of the largest fastest rivers on the continent, the Missouri.

We lived to tell the tale (barely), and so year after year, we took longer and longer adventures, floating a handful of rivers on completely ridiculous homemade rafts. After that first raft trip, we invited others, launching with whole punk raft flotillas. The experience has been life changing.


Alex and Jen and I were at Camp Tipsy and it was Happy Hour at our camp and we were drinking gin and tonics and maybe the alcohol contributed to our grandiose and ambitious scheming, or maybe, honestly, Ive always been that way.

Camp Tipsy Hot Tub by ropersf

We were looking at all the bizzaro floating contraptions and nautical imagining.  We didnt want to go fast or swing or be propelled by some Rube Goldberg propulsion system or even soak in a wood-fired hot tub, so much, at that moment, as we wanted to sit peacefully on our own floating front porch and watch the madness of the rest of the world.

We decided to make a floating cabin, a shanty boat. 


Read More..

Motor Well A Mini Project Unto Itself

| 0 komentar |
Oh, the motor well.  Seems simple enough.  Build a box that bolts to the back of the boat, upon which the motor clamps.

Ive been working on the motor well since the days of the Troublesome Skegs and before the Boat Flip.

Turns out that though this earns only a brief paragraph in the Glen-L Waterlodge instructions, it is really quite time consuming.


And though the motor well shows up on various views in the plans three times, it still leaves a lot of unspecified dimensions. Despite a lot of fancy maths including tangents and the Pythagorean theorem my first effort to suss out the missing dimensions and angles was a loose collection of mismatched angles and incorrectly cut two-by stock.


The challenge of the motor well is that there are few right angles, several that are very close, but not quite 90 degrees, several similar obtuse angles and some crazy acute angles. The difficulty lies in translating perfectly good angles and lengths to actual measurements and cuts.


My second attempt -- salvaging as much of the previously cut wood as I could -- discarded the mathematical approach and did it the way a carpenter would. Rather than cutting the two-by stock first, I marked out the known angles and measurements on plywood, solving the unknowns as I went along.  I cut out the 5/8" plywood giving me a useful template that would be used for the sides of the motor well.  Finally, I measured and marked the two-by members to match the template. Magic!


After fitting everything best I could, I epoxied everything together to give me two assembled sides to the motor well.


This was a logistical challenge similar to assembling the side stringers -- you want to align the two-by members facing up, but the screws need to go in from the other side.  In this case, the motor well sides were small enough I could assemble the two-by members facing up on saw horses, then put a few screws in from the bottom to hold them together.


After that, I flipped them over and screwed the shit out of them.  All done while everything -- drill, screws, wood, hands -- are covered in sticky goo. Fun!


I completely encapsulated the wood inside the motor well with epoxy to protect it from decay.


I know from experience assembling boxes, it is easy to discover in the end that youve created a parallelogram that doesnt fit your last side.  How to prevent this?


I temporarily screwed the bottom on the motor well to square up the sides before assembling the rest of the box.  Im using wax paper to prevent the epoxy from accidentally adhering the bottom.  In fact, the bottom wont go on until after the motor well is already bolted on to the hull to allow me access to the bolts.


Now, I can go ahead and epoxy and screw on the back and the framing members.


We have to bolt this thing in with 5/8 carriage bolts no greater than six inches apart.  Turns out thats a lot, really.


I marked the bolt holes and drilled from the outside of the motor well using a carpenters square to get holes perpendicular to the rake of the hull.


Sixteen bolts for this 2 foot square box hanging off the back of the boat.


The heads of some of the carriage bolts would fall on angled members, and so needed to be countersunk.


I needed to temporarily hang this thing so I can mark the bolt holes on the hull.  I built a little support jig that took into account the missing bottom piece.


Here is the motor well on the boat.  Fancy.


Using a wax china pencil, I marked the bolt holes for mounting the motor well.


It seemed like madness to drill 16 holes in my previously watertight boat hull.  Soon, well finish the outside of the motor well and bolt it on.

Read More..

How to make a boat tent for under 20

| 0 komentar |
Its that time of year again.  Spring Tweak time!  I know, I know, its more of a midsummer tweak.  Sorry, Im way behind schedule this year.

This years Spring Tweak is an inexpensive boom tent.
Most of the messabouts that I plan on attending this year require sleeping onboard the boat.  Unlike Sucia Islands abundant camping, many of the other destinations we like to visit have limited camping.  Saddlebag island, for instance, only has 5 campsites.  Hope Island, only 4.  Next week is the "Pocket Yacht Palooza", followed by a 4 day "Crooza" to several destinations which may or may not require sleeping onboard. Its also nice to have the option to tie up at a marina.  And theres always the possibility I could be late getting home and have to anchor who knows where for the night.  Having a boom tent onboard at all times really is a necessity. It doesnt have to be fancy in my opinion.  A quick and cheap one made from a tarp will do just fine.

So heres my version of the classic tarp-type boom tent.

After quick trip to the local Harbor Freight Tools store, I returned with this 11 x 15 foot cammo tarp for a mere $16.49, and a grommet kit for another $4.  $20 for a boom tent.  Cant beat that.

They also carry the classic blue and silver tarps too, of course, but lets be honest.  Theres really only one choice here.  Not only does cammo look good, in a far-less-tacky sort of way, but it also enables one to go Stealth Camping.  Stealth Camping, in case you are unfamiliar with the term, is the practice of arriving late at night, mooring up to someones private dock, boat, or any other no-camping area, and stealing away early in the morning before anyone realizes you were there.  I, of course, would never do such a thing ;-)

To support the tent I needed a ridgepole.  I lashed my boom and gaff together and use them as the ridgepole. My topping lift/jackstay line, and my peak halyard both prevent draping the boom tent over the ridgepole, so they get disconnected.  To support the ridgepole, I disconnect my mizzen halyard and connect it to the aft end of the ridgepole.
I measured the distance between the main mast and the point where the mizzen halyard connects to the ridgepole.  Then I cut two equal length slits in the tarp so that the distance between the slits was equal to that measurement.
That allowed me to drape the tarp over the ridgepole.

The next part is simple, as the famous sculptor Michelangelo allegedly once explained:
After marveling at Michelangelo’s statue of Goliath-vanquishing David, the Pope asked the sculptor, “How do you know what to cut away?”
Michelangelo replied “It’s simple. I just remove everything that doesn’t look like David.”
So I got out my scissors and trimmed away everything that didnt look like a boom tent.
I left some flaps at the front and rear of the boom tent so I could seal both ends off in a rainstorm.


The flaps can be rolled up and secured with a clip to keep them open, or tied down with a bit of rope to keep them closed.  I trimmed the sides even with my lower rubrail.

When I removed the tarp and laid it out flat, it looked like this.  Not an easy shape to define on a  drawing.  You can see why it really needs to be cut in-place.
 
The most difficult part about making a boom tent is coming up with a way to secure the sides.  Several methods have been employed.  Ropes can be strung under the boat from one side to the other.  Clips or snaps can be added to the gunnels to attach the boom tent to.  Ropes can be run fore-and-aft to provide an attachment point, and so on.  But the easiest, most effective, and elegant solution I have seen my friends use are sandbags.  Several small sandbags weighing about 1 lb each are fastened to the boom tent to weigh the sides down and keep them taught. They work very well and dont require a bunch of new holes to be drilled in the boat.

I didnt have enough time to make sandbags before our annual Sucia trip, so I improvised.  I used 500ml plastic water bottles instead of sandbags.  They actually worked quite well.
I drilled a small hole in the water bottle caps, tied them to the boom tent, and store the empty bottles under my front thwart.  When I need them, I simply reach over the side and fill them with seawater and screw them onto the bottle caps. The only thing I dont like about them is they tend to bounce against the hull at night, keeping me awake.  I think sandbags would be quieter so I plan on replacing them with sandbags soon.


My son Tim and I just got back from our annual Sucia Small Boat Rendezvous.  It rained off and on the entire weekend, but we were cozy and warm under this humble boom tent, using our sleeping platform. 

When we awoke in the morning, there were no signs of condensation or leaks anywhere inside the boom tent.  We were very pleased with the results.  Well worth the $20 to be sure.
Read More..